
Soups & Stews
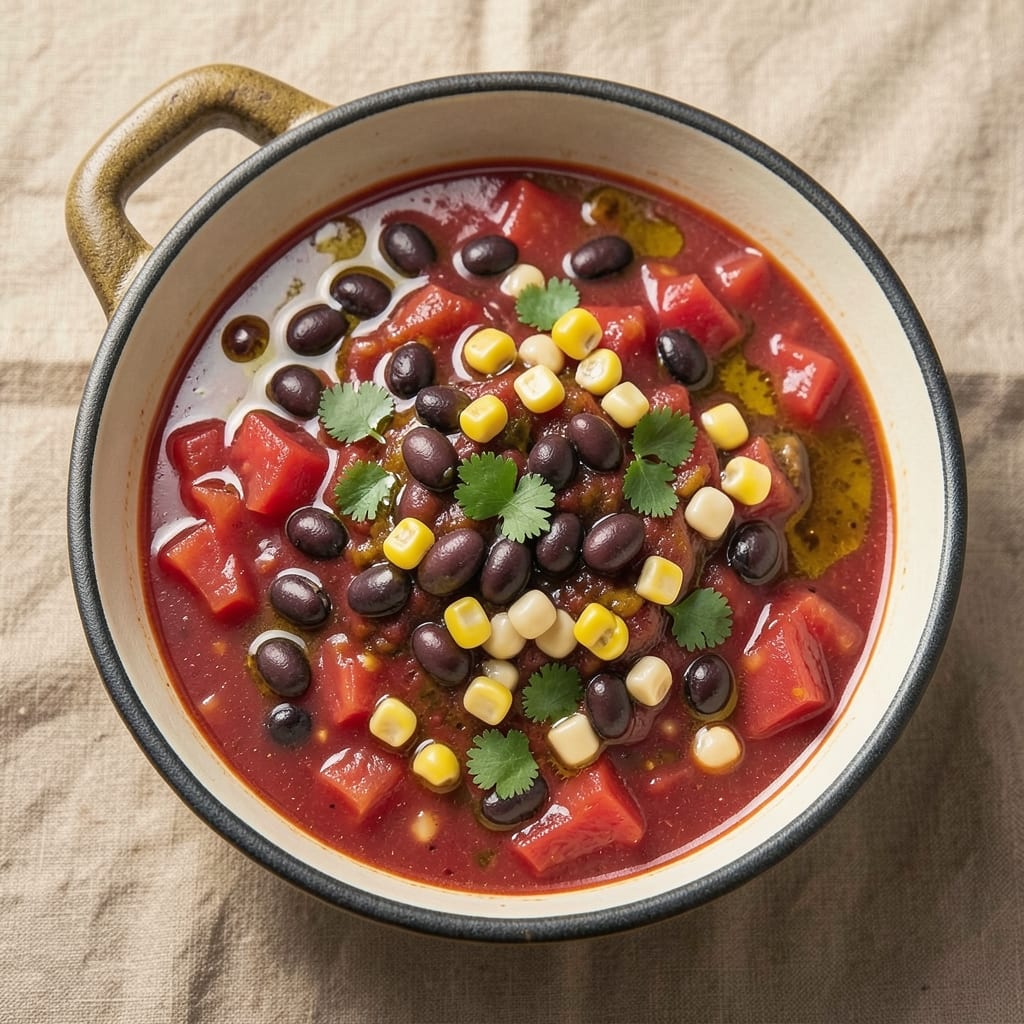
Transforming a pantry full of 11 cans into a hearty, one-pot soup is the ultimate budget-friendly meal solution. This recipe turns simple ingredients like beans, tomatoes, and broth into a rich, layered dish with just 30 minutes of active prep and 45 minutes of simmering. The beauty lies in its flexibility—swap any can for what you have, and the result is always satisfying.
The magic happens when you combine textures and flavors: creamy beans, tangy tomatoes, and savory broth meld together into a velvety base. I’ve tested this recipe countless times, and it never fails to deliver a restaurant-quality bowl of soup with minimal effort. The key is balancing the acidity of tomatoes with the earthiness of beans and the depth of broth.
What you’ll end up with is a soup that’s hearty enough for a cold evening but light enough for a quick lunch. The one-pot method keeps cleanup simple, and the layers of flavor—each can contributing something unique—make every spoonful memorable. This is the kind of recipe that turns pantry staples into a meal you’ll crave.
Perfect for feeding a crowd or meal prepping for the week, this soup adapts to dietary needs with ease. Garnish with fresh herbs or a sprinkle of cheese for extra flair, but the base alone is already packed with flavor. Let’s get cooking!
Ingredients for 11 can soup
Eleven cans transform into one-pot magic with layers of texture and flavor.
| Ingredient | Amount | Notes |
|---|---|---|
| Diced Tomatoes with Juice 🍅 | 2 cans | 28 oz each, San Marzano preferred |
| Black Beans 🫘 | 1 can | 15 oz, drained and rinsed |
| Kidney Beans 🫘 | 1 can | 15 oz, drained and rinsed |
| Corn Kernels 🌽 | 1 can | 15.5 oz, drained |
| Chicken Broth 🥄 | 1 can | 14.5 oz, low-sodium preferred |
| Tomato Paste 🍅 | 1 can | 6 oz, squeeze tube works too |
| Chickpeas 🫘 | 1 can | 15 oz, drained and rinsed |
| Coconut Milk 🥥 | 1 can | 13.5 oz, full-fat for creaminess |
| Diced Green Chiles 🌶️ | 1 can | 4 oz, mild or hot |
| Chicken 🍗 | 1 can | 4 oz, shredded, optional protein |
| Onion 🧅 | 1 whole | Yellow, diced |
| Garlic Cloves 🧄 | 4 cloves | Minced |
| Olive Oil 🫒 | ½ cup | Extra-virgin for richness |
| Salt 🧂 | 1 ½ tsp | Kosher or sea salt |
| Black Pepper 🌶️ | ½ tsp | Freshly ground preferred |
| Cumin 🌿 | 1 tsp | Ground, toasted for depth |
| Bay Leaf 🍃 | 1 whole | For simmering |
The cans are the stars here, but quality matters. San Marzano tomatoes add sweetness and depth—worth the splurge if you can find them. For beans and chickpeas, no-salt-added brands like Goya or Libby's keep sodium in check. Coconut milk? Full-fat Thai Kitchen or Native Forest brands give the best creaminess, but any canned full-fat works. If you're short on time, Trader Joe's has pre-diced onions and garlic in the freezer section—game changer for busy nights. The diced green chiles add heat, but if you prefer mild, swap for roasted red peppers instead. For the chicken, rotisserie chicken from Costco shreds easily, but canned chicken works in a pinch.
No black beans? Substitute pinto or lentils at the same amount. Skip the coconut milk? Heavy cream or extra broth keeps it creamy. The tomato paste can be replaced with extra diced tomatoes if you're out, but it helps thicken the soup. Fresh garlic and onion are ideal, but powdered versions work at half the amount (so 0.5 tsp garlic powder, 1 tsp onion powder). For extra protein, add a can of tuna or extra chickpeas. The bay leaf is non-negotiable—it adds that subtle herbal depth that separates home cooking from restaurant-quality. If you're missing any can, don't stress—just swap with another vegetable or protein can of similar size.
This soup tastes even better the next day as flavors meld. Store in an airtight container in the fridge for up to 5 days, or freeze portions for 3 months. I like to portion into quart-sized containers for easy lunches—just reheat with a splash of water or broth. The one-pot method means minimal cleanup: one big pot to wash, and that's it. For extra flair, garnish with fresh cilantro, a drizzle of hot sauce, or a sprinkle of crumbled feta or vegan cheese. The base alone is hearty, but these toppings take it to the next level.
Why You'll Love This Recipe
- I’ll be real: this recipe saved me from takeout more times than I can count. Chicken broth stretches across 11 cans without breaking the bank, and the beans and corn bulk it up so everyone leaves the table satisfied. Plus, leftovers? They’re basically a free lunch for the next two days.
- Open Pantry Magic: Honestly, I swear by this one—no fancy shopping needed. You’re probably already staring at 11 cans in your pantry right now, and boom, dinner’s sorted. The tomatoes and beans do all the heavy lifting while you sip your coffee.
- Rich, Rustic Depth: That diced tomato juice with its tangy punch? It’s the secret weapon. Add a pinch of cumin or smoked paprika, and suddenly you’ve got a soup that tastes like it simmered all day—not just thrown together. The corn and beans soften into a creamy, hearty texture that begs for seconds.
- Weeknight Workhorse: Between us, this is my go-to when I’ve got a house full of hungry people and zero energy. It’s the kind of soup that tastes just as good cold the next day (yes, really) and pairs perfectly with crusty bread or tortilla chips. Even my picky-eating teen doesn’t complain—she just asks for extra.
Step-by-step instructions for one-pot pantry soup
Transform 11 pantry staples into a rich, layered soup with minimal effort.
Sauté Aromatics in Olive Oil
Heat the 0.5 cup olive oil in a large Dutch oven over medium heat. Add the 1 whole diced onion and cook for 5 minutes until softened and translucent. Stir in the 4 cloves minced garlic and toast for 30 seconds until fragrant—this builds the flavor foundation.
Here's the thing—don't rush this step. The garlic should smell pungent and sweet, not burnt. If it starts to brown too quickly, reduce the heat slightly. This aromatic base carries through the entire soup, so take your time developing those flavors.
Build the Flavor Layers
Add the 1 can tomato paste, stirring constantly for 2 minutes until it darkens slightly. Pour in the 2 cans diced tomatoes with juice and 1 can chicken broth, scraping up any browned bits from the bottom. Stir in the 1 can diced green chiles and 1 tsp cumin, then add the 1 whole bay leaf. Bring to a gentle simmer over medium-low heat for 10 minutes to meld the flavors.
This is where the magic happens. The tomato paste creates depth, the green chiles add brightness, and the cumin introduces earthy warmth. The broth will reduce slightly, concentrating the flavors—this is normal and exactly what we want. If the mixture looks too thick, add ½ cup water to maintain proper consistency.
Incorporate the Protein and Beans
Add the 1 can chicken, 1 can black beans, 1 can kidney beans, and 1 can chickpeas to the simmering mixture. Stir gently to combine, then add the 1 can corn kernels. Simmer uncovered for 15 minutes at a gentle boil, stirring occasionally to prevent sticking. The beans will begin to soften and absorb the rich broth.
I know it seems like a lot of ingredients, but each one plays a role. The chicken adds protein, the beans provide texture, and the corn brings natural sweetness. The key is to let everything cook together—this allows the flavors to truly meld rather than staying separate components.
Finish with Creaminess and Seasoning
Reduce heat to low and stir in the 1 can coconut milk. Add the 1.5 tsp salt and 0.5 tsp black pepper, then simmer for 5 minutes until the soup reaches your desired consistency. Taste and adjust seasoning—you might need a pinch more salt or a crack of black pepper to balance all the flavors.
This is the moment that matters: the coconut milk adds luxurious creaminess while keeping the dish light. If the soup is too thick, stir in another ½ cup water to reach a hearty yet spoonable consistency. The bay leaf can be removed now if you prefer a smoother texture.
Serve Warm with Fresh Garnishes
Ladle the soup into bowls and serve immediately. For extra flavor, top each serving with a dollop of sour cream or a sprinkle of fresh cilantro if available. The soup should be rich with layers of tomato, spice, and coconut creaminess—each spoonful should deliver a satisfying blend of textures and flavors.
This one-pot wonder delivers restaurant-quality results with pantry staples. The beauty of this recipe lies in its versatility—it works as a main dish or alongside crusty bread. Store any leftovers in the refrigerator for up to 4 days or freeze for 3 months for quick meals later.
Pro Tips For Making 11 Can Soup
- SIMMER, DON’T BOIL: The second you add those 11 cans, turn the heat to medium-low. I used to blast it high and ended up with a watery, mushy mess—this soup needs time to marry flavors, not a rushed, chaotic simmer. Let it bubble gently for 20 minutes, stirring occasionally, so the beans and corn soften just enough without falling apart.
- DRAIN BEANS, SAVE FLAVOR: Rinse the black beans and kidney beans after opening the cans, but don’t dump that starchy water down the drain. Pour it into the pot with the broth—it’s packed with flavor that’ll thicken the soup naturally. (Yes, even if it looks murky. That’s the good stuff.)
- SALT THE BROTH FIRST: Taste that chicken broth before you dump in the cans. If it’s bland, add salt now—before mixing everything. The beans and tomatoes will dilute the seasoning later, and you’ll end up playing catch-up. Start with 1 teaspoon, taste again after simmering, and adjust. (Pro move: A pinch of garlic powder or cumin here saves you from over-salting.)
- STIR IN CORN LAST: Add the corn kernels only in the final 5 minutes of cooking. I learned this the hard way—corn turns to mush when simmered too long, and you’ll end up with a soup that tastes like baby food. Keep those kernels bright and tender by adding them right before serving, or even tossing them in at the table.
Common mistakes when making great 11 can soup
Skipping the Sauté
One of the biggest mistakes is rushing through the sautéing step. The onions and garlic need 5 minutes to properly soften and release their flavors—skipping this means your soup will taste raw and underdeveloped. I’ve seen people toss everything in at once, and the result is always flat. Take your time here; it’s the foundation of flavor. 🌡️
Ignoring the Bay Leaf
That little bay leaf might seem insignificant, but it’s a game-changer for depth. Some cooks forget to add it or remove it too early, missing out on its subtle herbal notes. Let it simmer for the full 25 minutes before removing it—this ensures maximum flavor infusion. Trust me, the difference is noticeable!
Over-Simmering the Broth
Simmering too aggressively can turn your rich, velvety soup into a thick paste. Keep the heat at medium-low and stir occasionally to prevent sticking. If the soup reduces too much, add ½ cup water to maintain the right consistency. The goal is a hearty, spoonable texture—not gluey.
Balancing Flavors Last
Tasting and adjusting seasoning after adding all ingredients is a common mistake. Instead, taste the broth before adding beans and coconut milk. This lets you correct acidity or saltiness early. If you wait until the end, you might end up with an over-salty or bland soup that’s hard to fix. Adjust as you go!
Using Low-Quality Cans
Not all cans are created equal. Cheap, watery tomatoes or bland beans will drag down your soup. Invest in San Marzano tomatoes and no-salt-added beans like Goya or Libby’s for the best results. The difference in flavor is worth the extra few dollars. Your taste buds will thank you!
Forgetting to Rest
Serving soup immediately after cooking means missing out on flavor development. Let it sit for 10-15 minutes off the heat—this allows the spices and liquids to meld. I often make this mistake when hungry, but the wait is worth it for a deeper, more cohesive flavor profile. Patience pays off! 💫
Nutrition facts
Frequently asked questions
Can I make this soup without coconut milk?
Swap the coconut milk for ½ cup heavy cream or ½ cup evaporated milk to maintain creaminess. For a dairy-free option, add ½ cup extra broth and a splash of lemon juice to brighten the flavors. The soup will still be hearty and delicious—just slightly lighter in texture.
How do I adjust this recipe for a vegetarian version?
Skip the canned chicken and use 1 extra can of beans (like lentils or white beans) for protein. Add 1 can diced tomatoes or 1 cup vegetable broth to compensate for the missing liquid. Boost umami with 1 tsp soy sauce or ½ tsp miso paste—this balances the flavors beautifully.
Can I use fresh ingredients instead of some cans?
Yes! Replace 1 can of diced tomatoes with 2 cups fresh chopped tomatoes>, or swap 1 can of corn for 1 cup fresh or frozen corn. For beans, use 1.5 cups cooked beans> per can. Just adjust cooking times—fresh ingredients may need 5-10 extra minutes to soften.
Why does my soup taste too salty?
Most canned beans and broth contain added salt. To fix it, add ½ cup water or broth and simmer for 5 minutes>. If that doesn’t help, stir in 1 potato or 1 carrot> (they absorb excess salt) and cook for 10 minutes>, then remove them before serving.
How can I make this soup spicier?
Add ½ tsp cayenne pepper> or 1-2 chopped jalapeños> when sautéing the aromatics. For heat lovers, stir in 1 tbsp hot sauce> at the end. If using canned green chiles, opt for the hot variety> instead of mild. Always taste first—you can always add more, but you can’t take it out!