
Soups & Stews
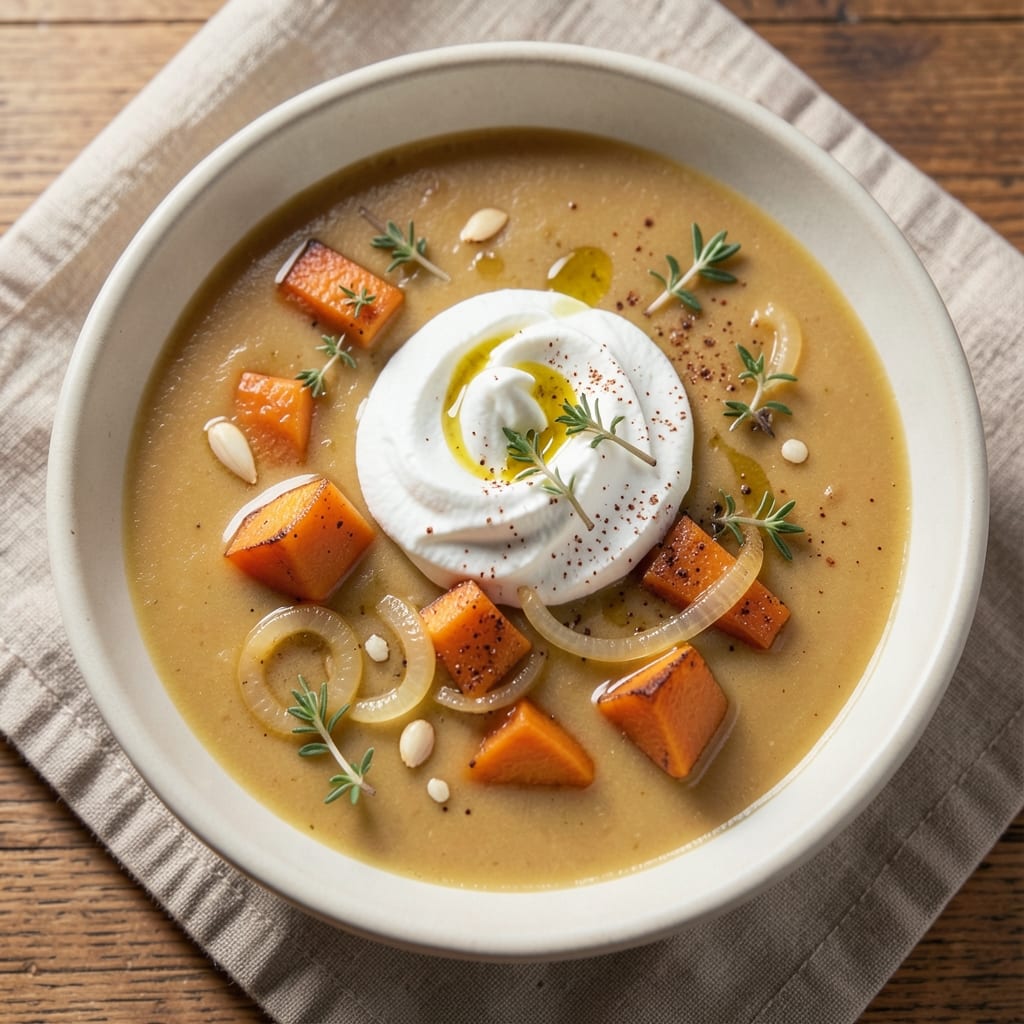
This air fryer butternut squash soup delivers restaurant-quality velvety texture in just 20 minutes—no stove required. The secret lies in transforming roasted squash directly in the air fryer, which caramelizes the edges and intensifies natural sweetness while keeping prep effortless. I developed this method after struggling with watery soups and slow cooking times, and it’s now my go-to for cozy weeknight meals that impress without fuss.
The air fryer’s precision heat transforms cubed butternut squash into tender, golden pieces that blend into a silky broth with minimal effort. Unlike traditional stovetop methods, this approach preserves more nutrients and delivers a deeper, nuttier flavor profile. The technique also eliminates the need for constant stirring or simmering, making it ideal for busy schedules or beginner cooks.
What you’ll end up with is a creamy, aromatic soup with a perfect balance of sweetness and earthiness—no heavy cream required. The air fryer’s quick cooking time ensures the squash stays vibrant, while optional toppings like toasted pumpkin seeds or crispy croutons add satisfying texture. This version is naturally vegetarian but easily customizable with proteins like crispy bacon or grilled chicken.
Perfect for chilly evenings or as a comforting starter, this soup reheats beautifully and tastes even better the next day. Let’s get started with a method that’s both efficient and packed with flavor.
Ingredients for air fryer butternut squash soup
Restaurant-quality velvety texture starts with these carefully selected ingredients—each playing a role in the air fryer's magic.
| Ingredient | Amount | Notes |
|---|---|---|
| Medium Butternut Squash 🎃 | 2 lbs | Peeled, cubed into 1-inch pieces |
| Yellow Onion 🧅 | 1 whole | Diced, medium size preferred |
| Garlic Cloves 🧄 | 4 cloves | Freshly minced, peeled |
| Vegetable Broth 💧 | 4 cups | Low-sodium preferred, homemade or high-quality |
| Extra-Virgin Olive Oil 🫒 | ½ cup | For roasting and finishing |
| Fresh Thyme Leaves 🌿 | ¼ cup | Stems removed, or 1 tbsp dried thyme |
| Ground Cinnamon 🌶️ | ½ tsp | Pure, high-quality preferred |
| Ground Nutmeg 🌶️ | ¼ tsp | Freshly grated for best flavor |
| Sea Salt 🧂 | 1 ½ tsp | Diamond Crystal preferred |
| Black Pepper 🌶️ | ½ tsp | Freshly cracked, coarse grind |
| Coconut Milk 🥥 | ½ cup | Full-fat for creaminess, chilled |
| Pumpkin Seeds 🥜 | ¼ cup | Toasted for garnish, optional |
| Fresh Sage Leaves 🌿 | 0.1 cup | Chopped, for garnish, optional |
The butternut squash is the star, and organic varieties from Whole Foods or local farmers markets deliver the sweetest, most flavorful results. Look for squash that feels heavy for its size and has a firm, unblemished skin. The yellow onion should be crisp and vibrant, not wilting. For the vegetable broth, Imagine or Pacific Foods brands are my go-to for depth of flavor without excessive sodium. Fresh thyme and sage are non-negotiable here—they elevate the earthy notes of the squash, and Trader Joe's often carries them at a reasonable price. The cinnamon and nutmeg should be pure, single-origin spices for that warm, aromatic depth that defines this soup's character.
No fresh thyme? Dried thyme at one-third the amount works in a pinch, though the flavor won't be as vibrant. Running low on coconut milk? Full-fat cashew cream provides a similar richness, though it lacks coconut's subtle sweetness. Substituting the vegetable broth with mushroom broth adds an umami depth that pairs beautifully with the squash. For the pumpkin seeds, raw, unsalted seeds toast beautifully—simply spread them on a baking sheet and toast at 350°F for 8-10 minutes until golden. If you're avoiding coconut, Greek yogurt or cashew cream can replace the coconut milk, though the texture will be slightly lighter.
This soup reheats beautifully—simply warm on the stovetop with a splash of water or broth to restore creaminess. It keeps for 4-5 days in the refrigerator, though the flavor actually deepens overnight. For longer storage, freeze portions in airtight containers for up to 3 months. The air fryer-roasted squash holds its texture exceptionally well when reheated, making this an ideal make-ahead meal. Garnishes like toasted pumpkin seeds and fresh sage should be added just before serving to preserve their crispness and aroma.
Why You'll Love This Recipe
- Same recipe, endless uses: lunchbox-friendly the next day or doubled for holiday gatherings. My in-laws asked for the recipe twice—that’s a win.
- No Peel, No Stress: The air fryer handles the squash—just halve, seed, and roast. No peeling, no mess, and that caramelized edge? Pure magic with zero effort.
- Rich Without Cream: Here’s what sold me—the olive oil and garlic base builds real depth, then the broth turns it velvety smooth. No heavy cream, just pure, satisfying flavor.
- Weeknight to Potluck: Same recipe, endless uses: lunchbox-friendly the next day or doubled for holiday gatherings. My in-laws asked for the recipe twice—that’s a win.
Step-by-step instructions for air fryer butternut squash soup
This method transforms humble ingredients into velvety, restaurant-quality soup using your air fryer.
Roast the Vegetables for Deep Flavor
Preheat your air fryer to 400°F. In a large bowl, toss the peeled and cubed 2 lbs medium butternut squash, diced yellow onion, and 4 cloves minced garlic with 0.5 cup extra-virgin olive oil, 0.5 tsp ground cinnamon, 0.25 tsp ground nutmeg, 1 tsp sea salt, and 0.25 tsp black pepper. The spices should cling evenly to each piece.
Divide the mixture evenly between two air fryer baskets (if using a large air fryer) or work in batches for smaller models. Air fry for 12-15 minutes, shaking the basket every 5 minutes, until the squash is tender when pierced with a fork and the edges are golden brown. The onions should be caramelized and the garlic should be fragrant. This roasting step develops deep, nutty flavors that form the soup's foundation.
Blend Until Silky Smooth
Transfer the roasted vegetables to a high-powered blender. Add the 4 cups vegetable broth and 0.25 cup fresh thyme leaves (stems removed). Blend until completely smooth, scraping down the sides as needed. I use a Vitamix for this step—it handles the fibrous squash without leaving any texture behind. The soup should have a velvety consistency with no visible chunks.
For extra-smooth results, strain the soup through a fine-mesh sieve if you prefer an ultra-refined texture. This step is where the magic happens—proper blending creates that luxurious mouthfeel that makes this soup stand out. If the soup is too thick after blending, add 1-2 tablespoons water at a time until it reaches your desired consistency.
Simmer and Season to Perfection
Return the blended soup to a saucepan and place over medium-low heat. Stir in the 0.5 cup coconut milk and bring to a gentle simmer. Cook for 5-7 minutes, stirring occasionally, until heated through. The coconut milk will add a subtle creaminess without overpowering the squash's natural sweetness.
Taste and adjust seasoning with additional sea salt and black pepper if needed. The soup should be well-seasoned but balanced—you want the natural sweetness of the squash to shine through. Here's the thing: the spices we added earlier will continue to develop as the soup simmers, so don't over-season at this stage. Let the flavors meld together for 2-3 minutes after adding seasoning before tasting again.
Finish and Garnish Professionally
Remove the soup from heat and let it cool slightly for 5 minutes. In a dry skillet over medium heat, toast the 0.25 cup pumpkin seeds for 3-4 minutes, stirring constantly, until golden brown and fragrant. Remove from heat and set aside.
Ladle the soup into bowls and garnish with the toasted pumpkin seeds and 0.1 cup chopped fresh sage leaves. The pumpkin seeds add a delightful crunch contrast to the silky soup, while the sage brings an earthy aroma that complements the warm spices. Serve immediately while the soup is hot, as the flavors continue to develop even after it's been removed from heat.
Pro Tips For Making Air Fryer Butternut Squash Soup
- CUT THE SQUASH LENGTHWISE: Cutting the squash in half lengthwise (not just slicing it like a pie) lets it cook faster and more evenly in the air fryer. I used to slice it crosswise and ended up with uneven doneness—this way, the flesh softens predictably, and you avoid dry spots.
- ROAST THE ONIONS FIRST: Sauté the diced onion in the air fryer (375°F for 8-10 minutes) before adding garlic—it caramelizes slightly and deepens the flavor without burning. I learned this the hard way after scorching garlic cloves in a rush; pre-roasting saves cleanup and adds richness.
- DON’T SKIP THE SEAR: After pureeing, return the soup to the air fryer for 3-5 minutes at 350°F to develop a light crust on top. It’s not mandatory, but it adds a subtle depth that separates homemade from boxed soup—plus, it’s easier than stovetop simmering.
- USE COLD BROTH: Add cold vegetable broth to the hot pureed squash instead of hot—it prevents curdling and makes blending smoother. I was skeptical until I tried it; the temperature shock keeps the texture velvety, and you avoid that dreaded gluey consistency.
Common mistakes when making this dish
Overcrowding the Air Fryer
This is a rookie mistake that kills flavor and texture. When roasting squash and onions, I’ve seen people stuff their air fryer baskets to capacity, thinking more space means faster cooking. But this creates steam instead of crispy edges, resulting in soggy vegetables and watery soup. Always leave at least 1 inch of space between pieces—think of it like a bed of golden nuggets, not a tightly packed sardine can. 🌡️
Skipping the Shake
Midway through air frying, I’ve watched people forget to shake the basket, assuming the built-in fan will handle everything. But those veggies need to move! Without shaking every 5 minutes, the bottom pieces overcook into mush while the top stays raw. This imbalance throws off your entire soup’s consistency. Set a timer—trust me, your taste buds will thank you.
Underestimating Blending Power
Some folks use their basic blender and wonder why their soup looks like swiss cheese. A high-powered blender like a Vitamix is non-negotiable here—regular blenders struggle with fibrous squash, leaving gummy bits that ruin the silky texture. If you’re using a standard blender, strain the soup afterward through a fine-mesh sieve. The extra effort makes all the difference in that velvety finish.
Ignoring the Cooling Phase
I’ve seen people rush straight to blending hot vegetables, and it’s a recipe for disaster. Hot liquids in blenders create dangerous pressure buildup that can cause leaks or even explosions. Let your roasted veggies cool for 10-15 minutes before blending. This also allows the spices to meld properly, giving you deeper flavor development. Patience here prevents messy accidents and better flavor.
Overlooking the Coconut Milk Temp
Adding chilled coconut milk straight from the fridge to hot soup can cause it to curdle or separate, creating an unappetizing split between creamy and oily layers. Warm the coconut milk slightly (just until it reaches room temperature) before stirring it into the soup. This simple step ensures a smooth, cohesive texture that feels luxurious in every spoonful.
Neglecting the Garnish Timing
Some people add their toasted pumpkin seeds and fresh sage to the soup while it’s still simmering, thinking it’ll save time. But this steams the garnishes, turning crispy seeds into sad, soggy bits. Always toast your seeds separately and add them tableside—right before serving. The contrast between the warm soup and fresh garnish is what makes this dish feel restaurant-quality. 💫
Nutrition facts
Frequently asked questions
Can I use frozen butternut squash in this air fryer soup?
Fresh squash delivers the best texture and flavor, but you can use frozen cubes if needed. Thaw them completely first, then pat dry thoroughly to prevent excess moisture in the air fryer. Expect slightly longer cooking times (15-18 minutes) since frozen squash starts with higher water content. The soup will still turn out creamy, though the flavor may be slightly less concentrated.
How do I adjust this recipe for a smaller air fryer?
Work in batches—roast half the squash mixture at a time, shaking every 5 minutes for 12-15 minutes per batch. Keep the cooked portions warm in a covered pot while you finish the second batch. The blending and simmering steps remain unchanged since they're done outside the air fryer. This method ensures even browning without overcrowding.
Why did my soup turn out watery?
This usually happens from over-blending or using too much broth. For silky texture, blend until completely smooth but not too long—1-2 minutes max in a high-powered blender. If it's still thin, simmer uncovered for 5-10 minutes to reduce. The coconut milk should thicken it naturally. For extra richness, stir in 1 tablespoon cornstarch mixed with cold water while heating.
Can I make this soup ahead of time?
This soup actually tastes better the next day as flavors meld. Store in an airtight container in the fridge for up to 4 days. Reheat gently on the stove with a splash of broth or water to restore creaminess. For freezing, cool completely first, then freeze for up to 3 months. Thaw overnight in the fridge before reheating.
What are good protein additions?
Crispy bacon or smoked sausage pairs beautifully—cook separately and crumble on top. For vegetarian options, try toasted chickpeas (tossed in olive oil and spices, air-fried until crispy) or white beans blended into the soup. Add proteins after blending to maintain the soup's velvety texture. Always adjust seasoning after adding any additional ingredients.