
Soups & Stews
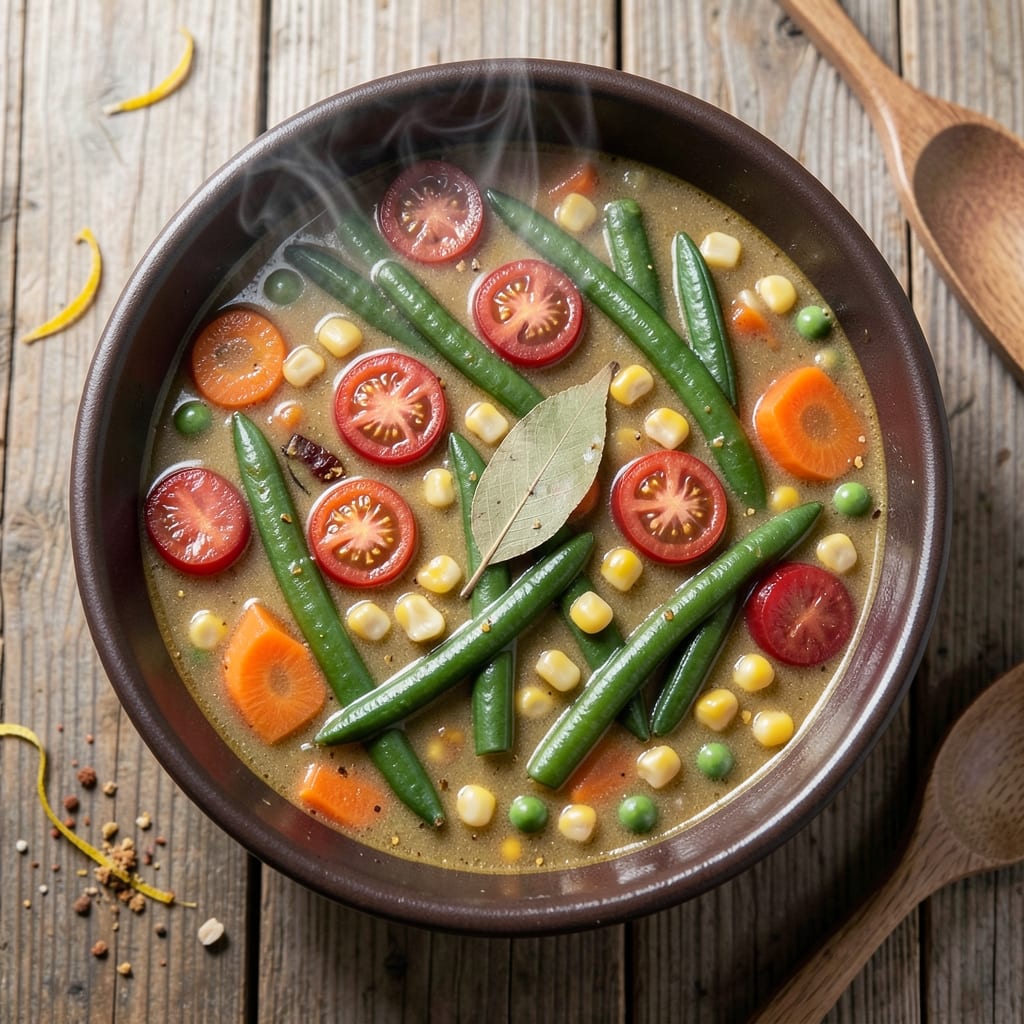
This 6-can vegetable soup recipe transforms pantry staples into a comforting, hearty meal with minimal effort and maximum flavor. The beauty of using canned vegetables lies in their convenience—no chopping, no peeling, just open, dump, and simmer. I developed this recipe during a particularly busy week when I needed a nourishing dinner that required almost no prep work, and it’s become a staple in my rotation ever since.
The secret to balancing canned vegetables lies in the seasoning and a few fresh additions that elevate the flavors. A splash of vinegar brightens the broth, while fresh herbs and a touch of creaminess from coconut milk or a spoonful of cream cheese add depth. The result is a soup that’s rich, satisfying, and packed with nutrients—perfect for chilly evenings or when you’re craving something warm and comforting without the fuss.
What makes this recipe truly special is its versatility. You can customize it with whatever canned vegetables you have on hand—carrots, corn, green beans, or even mixed vegetables—while still achieving a harmonious blend of flavors. The soup simmers until everything is tender and the flavors meld together, creating a comforting bowl that’s both simple and deeply satisfying. It’s the kind of meal that feels like a hug in a bowl.
Ready in under 30 minutes, this soup is ideal for weeknight dinners, meal prep, or even a quick lunch. The best part? It tastes even better the next day, making it perfect for leftovers. Whether you're feeding a family or just looking for a comforting meal for one, this recipe delivers heartiness without the hassle. Let’s get simmering!
Ingredients for 6 can vegetable soup
Six cans of comfort plus a handful of pantry staples—this soup is pure pantry magic.
| Ingredient | Amount | Notes |
|---|---|---|
| Vegetable Broth 💧 | 6 cups | Low-sodium preferred for balance |
| Canned Diced Tomatoes 🍅 | 2 cans | 14.5 oz each, San Marzano if available |
| Canned Carrots 🥕 | 2 cans | 15 oz each, drained |
| Canned Green Beans 🌿 | 1 can | 15 oz, cut into bite-sized pieces |
| Canned Corn Kernels 🌽 | 1 can | 15 oz, drained |
| Canned Peas 🌱 | 1 can | 15 oz, drained |
| Canned Mixed Vegetables 🥦 | 1 can | 15 oz, peas/carrots/corn blend |
| Coconut Milk 🥥 | ½ cup | Full-fat for creaminess |
| Red Wine Vinegar 🍷 | 1 tbsp | Brightens flavors beautifully |
| Fresh Parsley 🌿 | ¼ cup | Chopped, for freshness |
| Garlic Cloves 🧄 | 3 cloves | Minced for depth |
| Bay Leaves 🌿 | 2 whole | For aromatic base |
| Salt 🧂 | 1 ½ tsp | Diamond Crystal preferred |
| Black Pepper 🌶️ | ½ tsp | Freshly ground |
| Dried Thyme 🌿 | 1 tsp | Or 1 tbsp fresh |
The canned vegetables are the heart of this soup, so choose good-quality brands. Del Monte and Green Giant are reliable for their consistent quality, but any name brand works. Look for cans with no added salt—you’ll control the seasoning better that way. The San Marzano tomatoes make a world of difference if you’re feeling fancy, but regular diced tomatoes still deliver big flavor. Fresh herbs like parsley and thyme elevate everything, so grab a small bunch from the grocery store’s produce section—it’ll last longer than you think if you wrap it in damp paper towels and store it in a bag.
No coconut milk? Greek yogurt or a splash of cream adds creaminess in a pinch. Short on fresh herbs? Dried thyme at one-third the amount works, but fresh is ideal. The red wine vinegar might sound unusual, but it brightens the whole soup—substitute lemon juice if you’re out. Want to stretch this further? Add another can of beans or lentils for extra protein. The soup tastes even better the next day as flavors meld, so don’t hesitate to make a double batch for leftovers.
Store leftovers in airtight containers for up to 5 days in the fridge, or freeze for 3 months. I like to portion it into individual containers so I can grab and reheat a single serving. The broth keeps well too—strain and freeze it separately for future soups or grains. If you’re prepping ahead, you can even assemble the soup (without the fresh herbs) and refrigerate it for up to 2 days before simmering. Just add the herbs and a splash of water when reheating.
Why You'll Love This Recipe
- No Chopping Needed: I swear by this—just open six cans, dump them in a pot, and simmer. The carrots stay tender, the corn stays bright, and the tomatoes add that just-right tang without a single knife pulled out.
- Taste Like Summer: The sweetness of the corn and green beans balances the earthy broth, while the tomatoes keep it from tasting like "vegetable mushy." Add a pinch of salt and a squeeze of lemon, and it’s like a garden in a bowl.
- Meal Prep MVP: Make a double batch on Sunday, and you’ve got lunch for days. The flavors even get better the next day—my kids beg for it at school, and I just reheat and serve. (Yes, even on a Tuesday night.)
- Pantry Goldmine: Six cans mean six meals for pennies. No wilting veggies, no spoilage—just pure, reliable comfort. I keep a few cans in my pantry just for this, because it’s my go-to when I’m broke or busy.
Step-by-step instructions for 6-Can vegetable soup
This one-pot wonder transforms pantry staples into a velvety, aromatic soup with layers of flavor.
Sauté Aromatics for Deep Flavor Foundation
Heat a large Dutch oven or heavy pot over medium heat. Add the 3 cloves minced garlic cloves and 2 whole bay leaves to the empty pot and cook for 30 seconds until the garlic just begins to sizzle and release its aroma. This quick toasting prevents the garlic from burning while building a fragrant base.
Next, add the 1 teaspoon dried thyme and stir for 10 seconds to toast the spices. The thyme will release its earthy notes, creating the aromatic backbone for your soup. Here's the thing—don't skip this step. These aromatic elements are what transform simple canned vegetables into something truly special.
Build the Vegetable Base with Canned Goods
Pour in the 6 cups vegetable broth and bring to a gentle boil over medium-high heat. Once boiling, add the 2 cans drained canned carrots, 1 can canned green beans, 1 can canned corn kernels, 1 can canned peas, and 1 can canned mixed vegetables. Stir gently to combine, making sure all the vegetables are submerged in the broth.
Reduce heat to medium-low and let the soup simmer for 10 minutes until all the vegetables are heated through and the flavors begin to meld. You'll notice the carrots soften slightly and the peas begin to burst open, releasing their sweetness. This simmering step is crucial—it allows the vegetables to absorb the broth's flavors rather than just floating in it.
Enhance with Tomatoes and Acidic Brightness
Add the 2 cans canned diced tomatoes (with their juices) and the 1 tablespoon red wine vinegar to the pot. Stir well to incorporate. The tomatoes will add a rich, slightly tangy depth while the vinegar brightens the entire soup. This combination prevents the soup from becoming too heavy and adds complexity to each spoonful.
Continue simmering for another 5 minutes until the tomatoes are heated through and the soup reaches a gentle simmer. You'll see the tomatoes break down slightly, releasing their juices and creating a more cohesive texture. This is when the soup starts to come together—where all the individual flavors begin to harmonize.
Create Creamy Texture with Coconut Milk
Reduce heat to low and stir in the ½ cup coconut milk using a wooden spoon or silicone spatula. The coconut milk will create a luxurious, velvety texture without overpowering the vegetable flavors. Stir gently for 1 minute to fully incorporate, being careful not to create any lumps.
Season with the 1½ teaspoons salt and ½ teaspoon black pepper, tasting as you go. Remember, the broth might already be seasoned, so adjust gradually. Here's where it gets fun—the coconut milk not only adds creaminess but also introduces subtle sweetness that balances the acidity from the vinegar and tomatoes.
Finish with Fresh Herbs and Perfect Timing
Remove the pot from heat and stir in the ¼ cup chopped fresh parsley. The parsley adds a vibrant freshness that cuts through the richness of the coconut milk and balances the soup's overall flavor profile. Let the soup sit off the heat for 5 minutes to allow the flavors to meld completely.
Before serving, taste and adjust seasoning if needed. The soup should be perfectly balanced—slightly sweet from the tomatoes and corn, tangy from the vinegar, with a creamy finish from the coconut milk. Serve immediately while hot, garnished with additional parsley if desired. This soup is at its best when enjoyed fresh from the pot, where every ingredient contributes to a harmonious, comforting bowl.
Pro Tips For Making 6 Can Vegetable Soup
- Simmer Slow and Steady: I learned this the hard way—boiling this soup hard from the start turns the carrots to mush and burns the corn’s sweetness. Once everything’s in the pot, drop the heat to a gentle simmer (medium-low) and let it bubble just enough to hear an occasional tiny pop. Ten minutes of this is better than five minutes of aggressive boiling.
- Drain and Rinse Those Cans: The broth in canned veggies is salty and starchy, and if you ignore it, your soup will taste like a sad, watered-down version of itself. Drain the carrots, green beans, and corn, then give them a quick cold-water rinse to cut the excess starch. The tomatoes? Crush them by hand first—they’ll blend better and release flavor faster.
- Add Tomatoes Last: I used to toss in the diced tomatoes with the rest, and the soup always ended up tasting flat. The acidity needs time to brighten the broth, not get drowned out. Stir in the tomatoes and a pinch of sugar (yes, even if you’re skeptical) in the final 5 minutes of cooking. It balances the bitterness and makes the whole thing sing.
- Stir in the Beans Early: Green beans take longer to soften than you’d think, and if you add them late, they’ll stay crunchy while everything else turns to mush. Toss them in with the carrots—about 10 minutes before the soup is done—and let them simmer gently. They’ll stay tender-crisp without falling apart, and the soup won’t taste like you microwaved it for 20 minutes.
Pro cooking tips for great 6 can vegetable soup
Simmer Time Mastery
Don’t rush the simmering process—this is where magic happens. After adding all your canned vegetables, let the soup gently simmer for 10-15 minutes on medium-low heat. This allows the flavors to meld and the vegetables to soften just enough without turning mushy. I like to stir occasionally to prevent sticking, especially with the carrots and corn. The longer you simmer, the deeper the flavor, but avoid boiling vigorously, which can make the soup watery. 🌡️
Broth Balance Trick
If your broth tastes too bland, don’t just add salt—balance it first. A splash of red wine vinegar or lemon juice brightens the whole dish, while a pinch of sugar (just ½ teaspoon) can round out any bitterness. I often taste as I go, adjusting gradually. The goal is harmony, not overpowering any single flavor. This is where the coconut milk shines too—it adds creaminess without masking the vegetables.
Coconut Milk Secrets
For the creamiest texture, use full-fat coconut milk and stir it in gently over low heat to avoid curdling. If you’re worried about lumps, whisk it with a splash of broth first. I’ve found that adding it too early can make the soup separate, so always introduce it in the final 5 minutes of cooking. Pro tip: If you’re dairy-sensitive, this is a great way to get creaminess without butter or cream.
Fresh Herbs Timing
Add fresh parsley and any other herbs at the very end—right when you remove the soup from heat. This preserves their vibrant color and fresh flavor. If you’re prepping ahead, store herbs separately and add them just before serving. I also like to reserve a little extra parsley for garnishing, which makes the soup look as good as it tastes. The last-minute addition keeps the herbs from wilting into the broth. 🌿
Pot Choice Matters
Use a heavy pot like a Dutch oven or enamel-coated pot to distribute heat evenly and prevent scorching. I avoid thin, lightweight pots because they can’t maintain consistent heat, leading to uneven cooking. If you’re short on time, a slow cooker works too—just combine everything, cook on low for 4-5 hours, and stir in the coconut milk and herbs at the end.
Leftovers Hack
This soup actually tastes better the next day as the flavors meld further. Store leftovers in airtight containers for up to 5 days or freeze for 3 months. When reheating, add a splash of water or broth to restore creaminess. I like to portion it into individual servings before freezing so I can grab and heat just what I need. The coconut milk might separate slightly when reheated, but a quick stir brings it back together. 💫
Nutrition facts
Frequently asked questions
Can I use low-sodium broth to reduce salt content?
Using low-sodium broth is actually recommended to give you better control over the final seasoning. Just remember that canned vegetables often contain added salt too, so taste as you go and adjust with ½ teaspoon salt increments until you reach the perfect balance. The coconut milk and vinegar will help round out the flavors naturally.
What if I don't have coconut milk?
No problem! You can substitute with ½ cup Greek yogurt or ¼ cup heavy cream for creaminess, or even 2 tablespoons cream cheese for a richer texture. For a dairy-free option, try ¼ cup cashew cream (blended soaked cashews with water). The key is adding something creamy in the last 5 minutes of cooking to prevent separation.
How can I make this soup spicier?
Add ½ teaspoon cayenne pepper or 1 teaspoon smoked paprika when sautéing the garlic, or stir in 1 chopped chipotle pepper in adobo sauce with the tomatoes. For heat control, start with less and adjust to taste. A dash of hot sauce at the end also works beautifully!
Can I make this soup in an Instant Pot?
Yes! Sauté the garlic and thyme first, then add all ingredients except coconut milk and herbs. Cook on high pressure for 5 minutes, then quick-release. Stir in coconut milk and herbs at the end. The pressure cooker cuts time to about 15 minutes total—perfect for busy weeknights!
Why did my soup turn out watery?
Watery soup usually means the vegetables released too much liquid or the broth wasn't reduced enough. Next time, simmer uncovered for 10-15 minutes to let excess liquid evaporate, or mash some of the softer vegetables (like peas or carrots) to thicken naturally. If needed, remove the pot from heat and let it sit for 5 minutes to thicken slightly.