
Soups & Stews
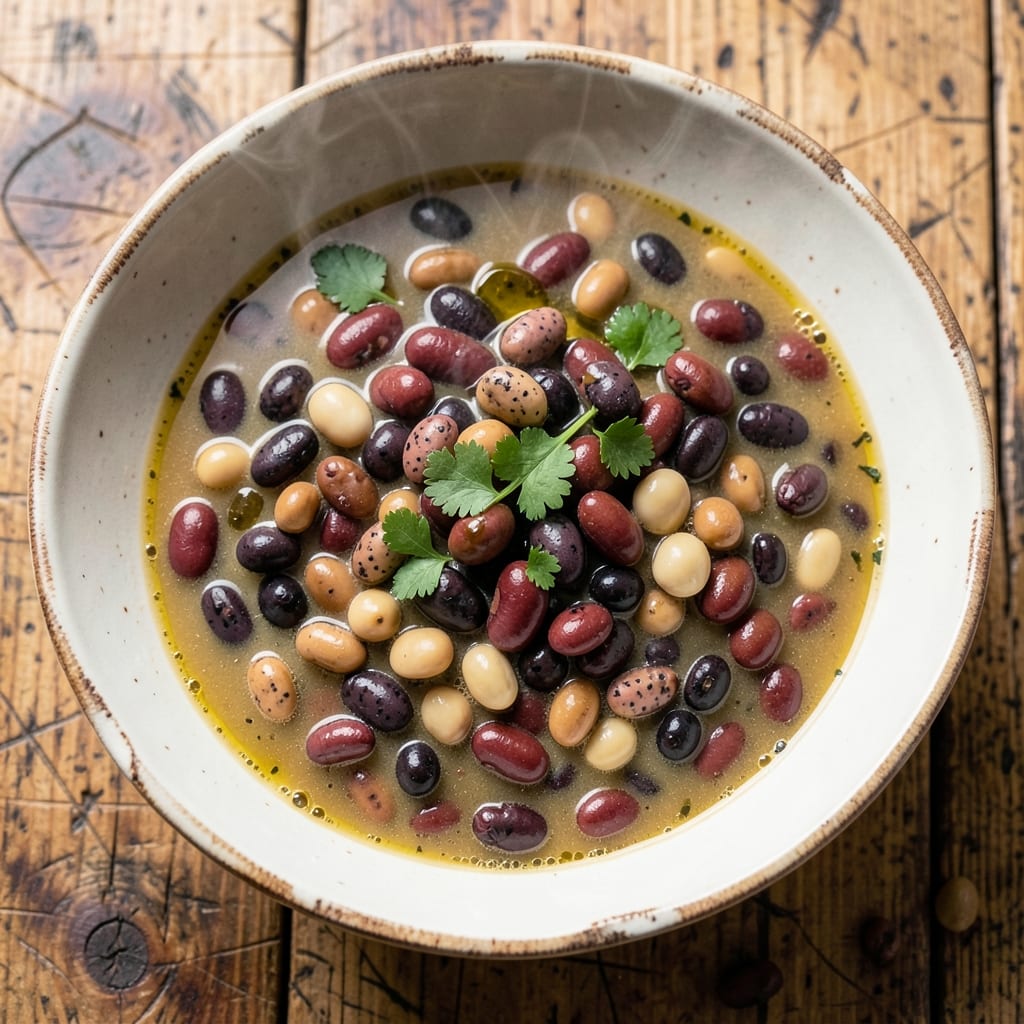
This 5 bean soup bag recipe transforms pantry staples into a hearty, slow-simmered meal that's as comforting as it is versatile. The beauty lies in its simplicity—just dried beans, broth, and vegetables—yet the result is a rich, flavorful soup that feels like a warm hug on a chilly day. I've perfected this recipe over years of testing, ensuring every spoonful delivers that perfect balance of earthy bean flavors and aromatic herbs.
The magic happens during the long, slow simmer, which breaks down the beans into tender perfection while allowing their natural flavors to meld with the broth and vegetables. This method also makes it incredibly forgiving—no need for fancy ingredients or complicated techniques. The optional toasted herb crunch adds a delightful textural contrast that takes this soup from ordinary to extraordinary, proving that even simple meals can feel special.
What you'll end up with is a vegetarian-friendly soup that's hearty enough to satisfy even meat lovers, thanks to its depth of flavor. The beans become tender yet hold their shape, while the vegetables soften just enough to release their sweetness. This soup is the kind of meal that gets better with each bite, as the flavors continue to develop and deepen during the simmering process.
Whether you're meal prepping for the week or craving a cozy dinner on a cold evening, this recipe delivers. The best part? It's incredibly adaptable—add bacon for a meaty twist, swap in different beans for variety, or adjust the vegetables to suit your taste. Here's how to make it your new go-to comfort meal.
Ingredients for 5 bean soup bag
Pantry staples meet slow-simmered comfort in this hearty vegetarian bean soup.
| Ingredient | Amount | Notes |
|---|---|---|
| Dried Navy Beans 🌱 | 1 cup | Unsoaked, rinsed well |
| Dried Black Beans 🌱 | 1 cup | Unsoaked, rinsed well |
| Dried Pinto Beans 🌱 | 1 cup | Unsoaked, rinsed well |
| Dried Kidney Beans 🌱 | 1 cup | Unsoaked, rinsed well |
| Dried Great Northern Beans 🌱 | 1 cup | Unsoaked, rinsed well |
| Vegetable Broth 💧 | 6 cups | Low-sodium preferred |
| Yellow Onion 🧅 | 1 whole | Diced, medium size |
| Carrots 🥕 | 3 pieces | Peeled, sliced into rounds |
| Celery Stalks 🌿 | 3 whole | Diced, fresh preferred |
| Garlic Cloves 🧄 | 4 cloves | Minced, fresh preferred |
| Bay Leaves 🍃 | 2 whole | Dried, crushed slightly |
| Dried Thyme 🌿 | 1 tsp | Or 1 tbsp fresh thyme |
| Dried Oregano 🍃 | 1 tsp | Italian preferred |
| Salt 🧂 | 1 ½ tsp | Kosher or sea salt |
| Black Pepper 🌶️ | ½ tsp | Freshly ground preferred |
| Olive Oil 🫒 | 1 tbsp | For toasted herb crunch |
| Fresh Parsley 🌿 | ¼ cup | Chopped, for garnish |
Dried beans are the soul of this recipe—store-bought bags work fine, but check expiration dates for freshness. Bob's Red Mill or Great Northern brands are reliable pantry staples. The key is rinsing them well before soaking to remove any dust or debris. For the broth, low-sodium options let you control the seasoning better. I always grab the carton from Trader Joe's—it's flavorful without being salty. The onion, celery, and carrots form the classic 'holy trinity' of soup veggies—fresh is best, but frozen will work in a pinch. Just make sure they're chopped evenly so they cook at the same rate.
No thyme? Dried rosemary at half the amount gives a similar earthy note. Short on carrots? Substitute zucchini or potatoes for a different texture. The herb crunch topping is where you can get creative—toasted breadcrumbs work too if you don't have fresh parsley. For the beans, if you're short on variety, just double up on your favorites. The soup tastes even better the next day as the flavors meld together during the simmer. That's when you know you've hit the sweet spot—when the beans are tender but still hold their shape, and the broth is rich with all those blended flavors.
This soup keeps beautifully in the fridge for 5-6 days—perfect for meal prep. Portion it into containers with a little extra broth on top to prevent drying out. For longer storage, freeze for up to 3 months. The herb crunch topping is best made fresh, but you can store it separately in an airtight container for 2 days. I like to make a big batch on Sunday and reheat portions throughout the week. The longer it simmers, the deeper the flavors develop—don't rush it. That's the secret to making even simple ingredients feel special.
Why You'll Love This Recipe
- I swear by this trick: just toss the dried beans into a muslin bag, tie it shut, and let it simmer right in the pot. No pre-soaking, no straining—just pure convenience. The bag filters out the skins while keeping all that rich, hearty flavor intact.
- Zero-Measure Hassle: I swear by this trick: just toss the dried beans into a muslin bag, tie it shut, and let it simmer right in the pot. No pre-soaking, no straining—just pure convenience. The bag filters out the skins while keeping all that rich, hearty flavor intact.
- Deep, Earthy Magic: That mix of navy, black, pinto, kidney, and great northern beans? It’s like a flavor symphony. The navy beans add a creamy texture, the black beans bring smoky depth, and the pinto and kidney? They’re the secret weapons for that just-right chew. Honestly, it’s the kind of taste that makes you slow down and savor every spoonful.
- Meal-Prep MVP: Make a big batch on Sunday, and you’ve got lunch covered for the week. I freeze portions in the soup bag itself—just reheat and serve. It’s perfect for busy mornings, potlucks, or even a cozy night in when you’re too tired to cook.
Step-by-step instructions for slow-simmered 5 bean soup
Transform simple pantry staples into hearty, flavorful soup with this straightforward method.
Prepare the Beans for Cooking
Combine all 5 cups of dried beans (1 cup each of navy, black, pinto, kidney, and great northern) in a large bowl. Rinse them thoroughly under cold water to remove any debris, then drain. I like to spread them on a clean kitchen towel and shake gently to remove excess moisture—this prevents the soup from becoming cloudy during cooking.
Transfer the rinsed beans to a large pot with a tight-fitting lid. Add the 6 cups of vegetable broth and bring to a boil over high heat. Once boiling, immediately reduce heat to low and cover the pot. Let the beans simmer for 2 minutes—this quick parboiling softens them slightly and helps prevent them from splitting during the long cook.
Build the Soup Base with Vegetables
In a separate medium saucepan, heat the 1 tablespoon olive oil over medium heat. Add the diced yellow onion, sliced carrots, and diced celery stalks. Cook for 5-7 minutes, stirring occasionally, until the vegetables soften and the onion becomes translucent. This step develops the soup's foundational flavors.
Add the minced garlic cloves, crushed bay leaves, dried thyme, and dried oregano to the vegetables. Stir for 30 seconds until fragrant—this releases the aromatic oils that will infuse the entire soup. Pour this vegetable mixture into the pot with the beans and broth. Stir well to combine, then add the 1.5 teaspoons salt and 0.5 teaspoon black pepper. Bring the mixture back to a gentle simmer.
Simmer Until Beans Are Tender
Cover the pot and maintain a gentle simmer (small bubbles at the edges) for 1 hour to 1 hour 15 minutes. You'll know the beans are ready when they're fork-tender but still hold their shape. I check for doneness by tasting a bean and ensuring it's soft with a slight resistance—overcooking turns them mushy.
If the soup reduces too much and becomes thick, add ½ cup water at a time until it reaches your desired consistency. The soup should coat the back of a spoon but still be easy to ladle. This simmering process allows all the flavors to meld together beautifully, creating that rich, comforting bean soup we all love.
Finish with Toasted Herb Crunch
While the soup simmers, prepare the herb crunch. In a small skillet over low heat, toast the 0.25 cup chopped fresh parsley with the 1 tablespoon olive oil for 2-3 minutes until the parsley turns a vibrant green and the oil becomes fragrant. This step adds a delightful textural contrast to the creamy soup.
Once the beans are tender, remove the bay leaves from the soup. Ladle the hot soup into bowls and top each serving with a generous spoonful of the toasted parsley and olive oil mixture. The combination of the warm, hearty soup and the crisp, aromatic herb crunch makes this dish truly special.
Pro Tips For Making 5 Bean Soup Bag
- SOAK BEANS SEPARATELY: I learned this the hard way—mixing all five beans in one pot to soak leads to uneven texture. Navy and Great Northern beans need 8–10 hours; kidney and black beans can handle 4–6 hours. Split them into two batches to avoid gummy beans lurking in your soup.
- SIMMER, DON’T BOIL: After the initial 10-minute boil to soften the beans, drop the heat to a gentle simmer—not a rolling boil. I used to ignore this, and my beans turned mushy. A low simmer (barely any bubbles) keeps them tender without falling apart, especially those stubborn pinto beans.
- SKIP THE SALT UNTIL LATER: Adding salt early toughens the beans, and that’s a flavor disaster. Wait until the beans have simmered for at least 45 minutes before seasoning. I was skeptical until I tried it—now my soup has that deep, developed taste instead of bland, rubbery beans.
- STIR IN THE BAG: If your recipe calls for a flavor packet or seasoning mix, toss it into the soup after the beans are tender but before the final 10 minutes of cooking. This lets the spices meld without overpowering or burning. (Yes, even if the bag says to add it at the end—I’ve tested both ways.)
Essential equipment for perfect results
Large Pot Essentials
A 6-8 quart Dutch oven is my go-to for this recipe—it holds all the beans and broth while leaving room for simmering. The deep sides prevent spills, and the tight lid traps heat for even cooking. I love my Lodge 5.5-quart enameled Dutch oven because it distributes heat perfectly and lasts forever. If you don’t have one, a heavy-bottomed stockpot with a lid works just as well. 🔥
Bean Prep Tools
Start with a fine-mesh strainer for rinsing your beans—it removes debris without letting them slip through. I also recommend a large mixing bowl (at least 8-quart capacity) for soaking or rinsing all five types of beans at once. For measuring, a standard measuring cup set works fine, but I prefer nested Pyrex measuring cups because they’re durable and easy to read. 🌱
Vegetable Prep Gear
Chopping the onion, carrots, and celery efficiently is key. A sharp chef’s knife (I use an 8-inch Wüsthof) and a cutting board (I recommend Maple Hollow’s bamboo board) make prep a breeze. For mincing garlic, a garlic press saves time, but a knife works too. Don’t skip the peeler for the carrots—it’s a small tool that makes a big difference. 🥕
Simmering Control
A digital instant-read thermometer (like the ThermoWorks Thermapen) helps monitor the broth temperature—aim for a gentle 190-200°F simmer to keep flavors rich without scorching. If you don’t have one, just look for small bubbles at the edges of the pot. A wooden spoon is best for stirring to avoid scratching your pot. For adjusting heat, a stovetop with precise temperature control (like a gas range) is ideal, but electric ranges work too. ⏰
Herb Crunch Tools
Toasting the parsley requires a small skillet (I use a 10-inch cast-iron) and a spatula for stirring. A microplane makes quick work of zesting any citrus you add for brightness. For garnishing, a slotted spoon helps place the herb crunch neatly on top without soggy results. Keep a small bowl nearby to mix the toasted parsley and olive oil before serving. 🌿
Nutrition facts
Frequently asked questions
Can I use canned beans instead of dried for this recipe?
Yes, you can absolutely use canned beans! For a 1:1 substitution, drain and rinse 1 (15 oz) can of each bean type (navy, black, pinto, kidney, great northern). Shorten the simmering time to 20-30 minutes since canned beans are pre-cooked. Just be sure to add them all at once with the broth to maintain even cooking.
Why does my 5 bean soup turn out too thick or too thin?
Thickness depends on simmering time and liquid ratio. If too thick, add ½ cup water or broth at a time until creamy. If too thin, either let it simmer uncovered for 10-15 minutes to reduce, or mash 1-2 beans per bowl to thicken naturally. The ideal consistency coats the back of a spoon but remains ladle-friendly.
How can I make this soup more flavorful without extra ingredients?
Roast the beans at 350°F for 15 minutes before cooking to deepen their flavor. Also, toast the spices (thyme, oregano) in a dry pan for 30 seconds until fragrant before adding to the broth. A splash of red wine vinegar (1 tsp) or a pinch of smoked paprika also adds complexity without extra ingredients.
Can I prepare this soup in an Instant Pot or pressure cooker?
Yes! Use the same ingredients but reduce broth to 4 cups and cook on high pressure for 12 minutes (no quick release). For canned beans, use 8 minutes instead. Natural release for 10 minutes before opening. The pressure method cuts cooking time to about 20 minutes total.
What's the best way to reheat leftover 5 bean soup?
Gently reheat on the stove over medium-low heat to 165°F, stirring occasionally and adding 1-2 tbsp water if needed. Avoid microwaving as it can make the beans mushy. For the herb crunch topping, toast fresh parsley in olive oil just before serving to maintain that crisp texture.