
Soups & Stews
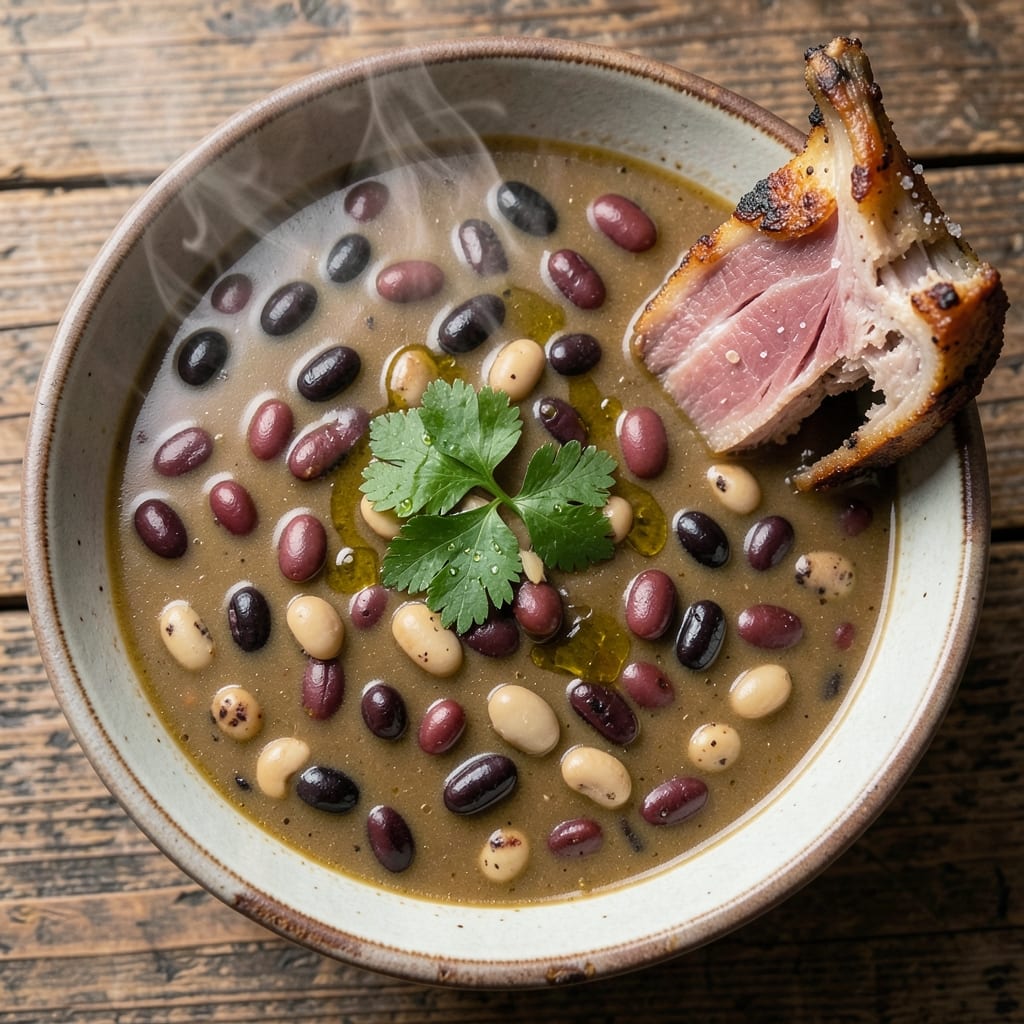
This 12 bean soup recipe with ham bone transforms humble pantry staples into a deeply flavorful, slow-simmered masterpiece that tastes like a Sunday supper. The ham bone isn’t just an ingredient—it’s the secret weapon that infuses the broth with rich, savory depth while keeping the beans tender and the soup hearty enough to feed a crowd. After years of perfecting this recipe, I’ve found that patience pays off: letting the flavors meld over hours creates a complexity you won’t find in quicker versions.
The beauty of this soup lies in its simplicity and tradition. You’ll start with a simple broth base, but the ham bone works its magic as it simmers, extracting collagen and flavor into the liquid. The beans—each with its own unique texture and taste—soak up that savory essence, while the slow cook transforms them into a harmonious blend. This isn’t just a soup; it’s a comforting, nourishing dish that warms the soul and fills the house with an aroma that’s impossible to resist.
What you’ll end up with is a restaurant-quality bowl of soup that’s rich, hearty, and packed with layers of flavor. The ham bone ensures a depth that’s hard to replicate, while the variety of beans adds texture and nutrition. Whether you’re preparing for a family gathering or simply craving a comforting meal, this recipe delivers on both flavor and satisfaction. The best part? It only gets better with time, as the flavors deepen and the broth becomes even more velvety.
Ready to dive in? This recipe is designed to be both traditional and adaptable—whether you’re using a slow cooker for convenience or a stockpot for classic results. Let’s get started on creating a soup that’s as rewarding to make as it is to eat.
Ingredients for 12 bean soup recipe with ham bone
Pantry staples meet slow-cooked magic—just 15 ingredients for restaurant-style richness.
| Ingredient | Amount | Notes |
|---|---|---|
| Ham Bone 🍖 | 1 whole | Smoked or unsmoked, 1-2 lbs preferred |
| Dried Navy Beans 🫘 | 1 cup | Rinsed before soaking |
| Dried Black Beans 🫘 | 1 cup | Rinsed before soaking |
| Dried Kidney Beans 🫘 | 1 cup | Rinsed before soaking |
| Dried Pinto Beans 🫘 | 1 cup | Rinsed before soaking |
| Dried Great Northern Beans 🫘 | 1 cup | Rinsed before soaking |
| Dried Cannellini Beans 🫘 | ½ cup | Rinsed before soaking |
| Dried Chickpeas 🫘 | ½ cup | Rinsed before soaking |
| Dried Lentils 🌾 | ½ cup | Green or brown preferred |
| Dried Split Peas 🌾 | ½ cup | Yellow or green variety |
| Dried Lima Beans 🫘 | ¼ cup | Butter or large variety |
| Dried Anasazi Beans 🫘 | ¼ cup | Rinsed before soaking |
| Yellow Onion 🧅 | 1 whole | Chopped into large chunks |
| Carrot 🥕 | 2 whole | Cut into thick slices |
| Celery Stalks 🥬 | 3 whole | Cut into 2-inch pieces |
| Garlic Cloves 🧄 | 4 cloves | Smushed, not minced |
| Bay Leaves 🌿 | 2 whole | Fresh preferred |
| Thyme Sprigs 🌿 | 2 whole | Or 1 tsp dried thyme |
| Salt 🧂 | 1 ½ tsp | Kosher or sea salt |
| Black Peppercorns 🌶️ | 1 tsp | Crushed lightly |
| Olive Oil 🫒 | 2 tbsp | For initial sear |
| Tomato Paste 🍅 | 2 tbsp | Squeeze tube preferred |
| Apple Cider Vinegar 🍎 | 1 tbsp | For brightness |
| Fresh Parsley 🌿 | ¼ cup | Chopped for garnish |
The ham bone is non-negotiable here. Look for a 1-2 lb bone at your local butcher shop—they often have them on hand, especially around holidays. Costco and Trader Joe's sometimes carry them too, but call ahead. Smoked bones add depth, but unsmoked works fine if that's what you've got. The key is letting it simmer low and slow—6-8 hours minimum—so it releases all that collagen and flavor. Don't skip the initial sear in olive oil though; it builds the foundation for that rich broth. For the beans, I always grab a mix of dried varieties from Bob's Red Mill or the bulk section at Whole Foods—they hold up better than canned and taste fresher.
No smoked ham bone? Substitute with a chicken or turkey carcass—just add a bay leaf and peppercorn to mimic the smokiness. Short on navy beans? Swap in white beans or even cannellini at the same amount. The tomato paste can be skipped if you're avoiding it, but a splash of balsamic vinegar adds that same depth. Fresh thyme is ideal, but dried at one-third the amount works in a pinch. For the vegetables, don't worry about exact measurements—eyeball the onion, carrot, and celery since they'll soften significantly. The apple cider vinegar might seem odd, but it brightens the whole soup—trust me on this. And if you're using a slow cooker, add everything raw for convenience; if you're stovetop, par-cook the beans first to save time.
This soup tastes even better the next day as the flavors meld. Store in the fridge for up to 5 days—the broth gets richer over time. For freezing, portion into 2-cup servings with a bit of broth, leaving space at the top. It keeps for 3 months and reheats beautifully. The beans will soften further when reheated, so start with slightly firmer beans if you prefer texture. I always make a double batch—one for dinner, one for lunches. The ham bone? Save it for future batches or make broth with the leftover meat.
Why You'll Love This Recipe
- No-Soaking Required: I’ll admit, I used to dread the soak. But this soup? Just toss those dried beans in a pot with the ham bone, cover with water, and let them simmer overnight. The ham bone does all the work—no pre-soaking, no fuss, just pure convenience.
- Deep, Savory Magic: That ham bone? It’s the secret weapon. As it simmers, it infuses the beans with rich, smoky flavor—think slow-cooked porky depth that turns this into something special, not just another bean dish. The mix of navy, black, kidney, and pinto beans adds texture too.
- Weeknight Crowd-Pleaser: Between us, this is my go-to for game days, family dinners, or when friends drop by unannounced. It’s hearty enough to fill bowls but simple enough that I’m not stuck in the kitchen. Plus, everyone always asks for seconds—even the picky eaters.
- Budget-Friendly Leftovers: Honestly, I make a double batch because the leftovers are that good. The flavors only get better after a day or two, and it stretches across lunches, salads, or even sandwiches. A ham bone costs next to nothing, and dried beans last forever—this soup pays for itself.
Step-by-step instructions for 12 bean soup with ham bone
This hearty soup builds flavor layer by layer—starting with the ham bone's rich broth and ending with a perfect balance of textures.
🍳 Step 1: Sear the Ham Bone and Sauté Vegetables
Preheat your largest pot over medium-high heat. Add the 2 tablespoons olive oil and place the ham bone fat-side down. Let it sear for 5-7 minutes until the fat is golden and crispy, and the bone releases easily from the pot. This creates a flavorful crust that infuses the broth.
Remove the ham bone and set it aside. In the same pot, add the chopped yellow onion, sliced carrots, and chopped celery stalks. Cook for 5-7 minutes until the vegetables soften slightly and release their aromas. Stir occasionally to prevent burning. Here's where the soup's foundational flavors begin to develop—don't rush this step.
🥘 Step 2: Build the Flavor Base
Add the 4 smashed garlic cloves, 2 tablespoons tomato paste, and 1 tablespoon apple cider vinegar to the pot. Stir well and cook for 2 minutes until the tomato paste darkens slightly and the garlic becomes fragrant. This combination adds depth and a touch of tang that brightens the entire soup.
Return the ham bone to the pot and add 8 cups water (enough to cover everything by about 2 inches). Bring to a boil, then reduce heat to low and add the 2 whole bay leaves and 2 whole thyme sprigs. Let it simmer uncovered for 30 minutes, skimming off any foam that rises to the surface. This initial simmer helps extract collagen from the bone and softens the vegetables.
👨🍳 Step 3: Add All the Beans and Seasonings
After the initial simmer, add all the dried beans: 1 cup each of navy beans, black beans, kidney beans, and pinto beans, plus 1 cup great northern beans, 0.5 cup each of cannellini beans, chickpeas, lentils, and split peas, and 0.25 cup each of lima beans and Anasazi beans. Stir gently to combine, making sure all the beans are submerged in the liquid.
Add the 1.5 teaspoons salt and 1 teaspoon crushed black peppercorns. The beans will need time to rehydrate and soften, so this is where patience pays off. Bring the soup back to a gentle simmer, then reduce heat to low and maintain a slow simmer. Cover partially with a lid and let it cook for 1.5 hours, stirring occasionally to prevent sticking.
⏰ Step 4: Simmer Until Beans Are Tender
After the initial 1.5 hours of simmering, check the beans for tenderness. They should be soft but still hold their shape—no mushy texture. If they need more time, continue simmering for another 30-45 minutes, checking periodically. The ham bone should also be tender enough to easily pull meat from it with a fork.
Once the beans are tender, remove the ham bone and strain the broth through a fine-mesh sieve into a large bowl, pressing gently on the solids to extract as much flavor as possible. Discard the bay leaves and thyme sprigs. Return the broth to the pot and add the cooked beans. Taste and adjust seasoning with additional salt if needed. The soup should be rich, flavorful, and perfectly balanced.
🍽️ Step 5: Finish and Serve
Let the soup simmer uncovered for another 10-15 minutes to allow the flavors to meld and the broth to reduce slightly. Stir in the 0.25 cup chopped fresh parsley just before serving. The parsley adds a fresh contrast to the deep, savory flavors of the soup.
Serve the soup hot, garnished with additional parsley if desired. The combination of tender beans, rich broth, and crispy ham bone meat makes this a deeply satisfying dish. Leftovers keep well in the refrigerator for up to 5 days, and the flavors actually improve as the soup sits.
Pro Tips For Making 12 Bean Soup Recipe With Ham Bone
- BLANCH BEANS FIRST: Dump those dried beans straight into the pot and you’re asking for trouble—longer cook times and uneven texture. Instead, rinse them well, then simmer in fresh water for 10 minutes before adding to the ham bone broth. Navy beans especially benefit from this; they’ll soften faster and keep their shape. ---
- CRACK THE HAM BONE: That whole ham bone? Don’t just toss it in. Smash the knobby ends with a heavy pan or meat mallet—it releases more marrow and flavor into the broth. I learned this the hard way after a soup that tasted like it was missing something. ---
- SKIP THE CROWDED POT: Beans need room to breathe, or they’ll turn mushy and the soup will taste gluey. Use a big enough pot so the liquid covers the beans by at least 2 inches, and stir occasionally to prevent sticking—especially the pinto beans, which love to clump. ---
- SAVE THE SOAK WATER: You don’t need to soak dried beans overnight, but if you do, don’t pour that starchy water down the drain. Strain it, add it to the soup later, and you’ll get a richer, creamier base. (Yes, even if it looks weird—it works.)
Essential equipment for perfect results
Large Stockpot
A 6-8 quart heavy-bottomed stockpot is essential for this recipe—it needs to handle the volume while distributing heat evenly. I swear by my All-Clad stainless steel stockpot because it prevents hot spots and makes skimming foam effortless. If you don’t have one, a Le Creuset Dutch oven works beautifully too, especially if you’re also using it for searing the ham bone. 🔥
Fine-Mesh Sieve
You’ll need a stainless steel fine-mesh sieve (like the OXO Good Grips) to strain the broth after simmering. This removes all the solids while preserving the rich, gelatinous collagen from the ham bone. I’ve tried plastic sieves, but they clog easily with bean skins—stick to metal for longevity. The sieve should be at least 8 inches wide to handle the volume.
Meat Thermometer
A digital instant-read thermometer (I use the ThermoWorks Thermapen) is a game-changer for checking the ham bone’s internal temperature. Aim for 195°F—this ensures the collagen breaks down completely, giving your soup that velvety texture. Without one, you risk overcooking the beans or undercooking the bone. It’s worth the investment for any soup or stew recipe.
Slow Cooker Option
For hands-off cooking, a 6-quart slow cooker (like the Hamilton Beach Programmable) works perfectly. Just add everything raw, set it to Low for 8 hours, then switch to Warm until ready to serve. The slow cooker’s gentle heat mimics the stovetop’s low simmer, making it ideal for busy days. Pro tip: Use the soup setting if available—it’s designed for long simmering times.
Immersion Blender
An immersion blender (such as the Ninja Professional) lets you blend the soup directly in the pot for a silky texture without transferring liquids. Pulse for 10-15 seconds if you prefer a smoother consistency, but leave some beans whole for texture. This tool is especially handy if you’re serving the soup to kids or prefer a more refined finish. 💫
Optional: Pressure Cooker
If you’re short on time, an Instant Pot or electric pressure cooker cuts cooking time to under 2 hours. Use the Soup setting for 90 minutes, then natural release for 15 minutes. The pressure cooker extracts flavors faster, but the broth won’t be as gelatinous as with slow simmering. I reserve this method for weeknights when I need a quick but still hearty meal.
Nutrition facts
Frequently asked questions
Can I substitute the ham bone with something else for vegetarian or budget-friendly options?
For a vegetarian version, use a mushroom broth base (like shiitake or portobello) with 1 tablespoon soy sauce or miso paste for umami depth. For budget-friendly meat options, try a chicken carcass or pork trotter—both add rich collagen. If avoiding meat entirely, a vegetable bouillon cube (like Better Than Bouillon) works, but the broth won’t be as gelatinous. The key is replicating the savory foundation the ham bone provides.
How do I know when the beans are fully cooked but not mushy?
Test for doneness by mashing a few beans between your fingers—they should be tender but still hold shape, like al dente pasta. For variety, some beans (like navy or great northern) will soften faster than others (like lima or Anasazi). If they’re still firm after 2.5 hours total simmering, add 1 cup extra water and cook another 30 minutes. Overcooking turns beans to mush, so check every 30 minutes after the initial 1.5 hours.
Why does my soup taste bland even after following the recipe?
Blandness usually comes from skipping the ham bone sear or not simmering long enough. First, ensure you seared the bone until golden and crispy—this builds flavor. Second, the 6-8 hour simmer is critical for collagen extraction. If short on time, try adding 1 teaspoon smoked paprika or 1/2 teaspoon liquid smoke to mimic the ham’s depth. Finally, taste as you go—adjust with salt, black pepper, or a splash of apple cider vinegar (it brightens flavors without overpowering).
Can I make this soup in a slow cooker, and how does the texture differ?
Use a 6-quart slow cooker on Low for 8 hours (or High for 5-6 hours). The texture will be slightly less gelatinous than stovetop simmering, but still hearty. The slow cooker’s gentle heat preserves bean integrity better, so you might need 10-15 minutes extra cooking time compared to stovetop. For extra richness, add the ham bone 1 hour earlier than the beans—this maximizes flavor extraction. The broth will be thinner but still deeply flavorful.
What’s the best way to store and reheat leftovers?
Store in an airtight container in the fridge for up to 5 days—the flavors actually improve! For reheating, transfer to a pot and warm over medium-low heat, stirring occasionally. Add 2-3 tablespoons water or broth if the soup thickens too much. Microwaving works too: 2-minute intervals on medium power, stirring between each. The beans will soften further, so reheat just until steaming hot. Freeze portions in 2-cup servings with a bit of broth in each container for up to 3 months.